Good logistics management is vital to business success as it ensures the timely delivery of the organisation’s requirement for fulfilment of its products or services in an economical, safe, efficient and timely manner.
Shops are now more than ever having to adapt the way they manage their supply chain in order to meet consumer demand during peak periods.
Let’s start configuring logistics planning module.
- First of all, we need to enable logistic planning via the shop settings.

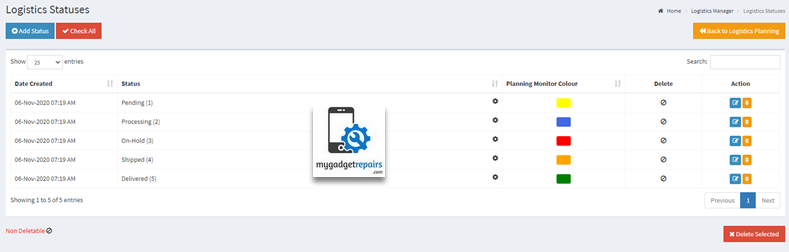
- Once enabled you can head to the Logistic Statuses, By default system created the following 5 statuses but if your workflow requires more then please add them accordingly. These status work exactly like the ticket statuses where you can add “Follow Up Reminders” and “Additional Notifications” as well as change the order. Please note that system statuses can not be removed but can be renamed. If you have drivers then please add them as the statuses so you know who is doing which delivery.
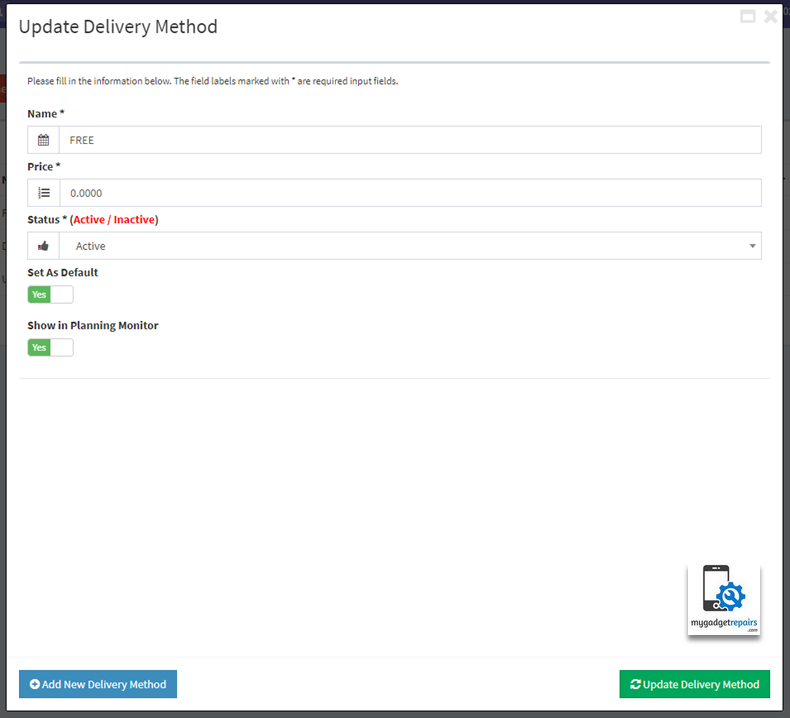
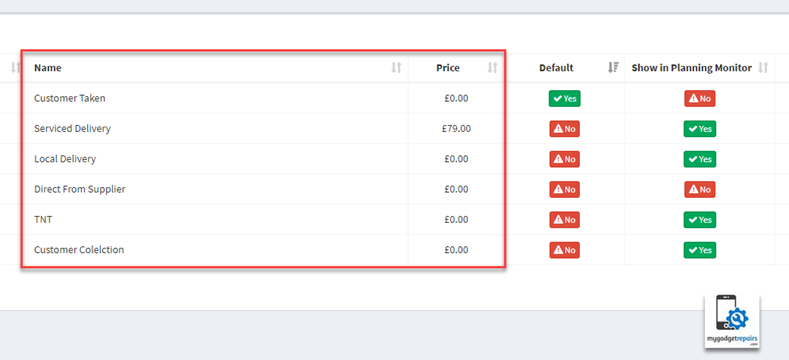
- Once you’re happy with the statuses then please head to Delivery Methods. on the logistic planning screen, everything is grouped as the delivery methods. By default delivery methods will be empty so you will need to create them according to what you offer, these methods will also be shown on the ticket and pos interfaces so you charge accordingly.
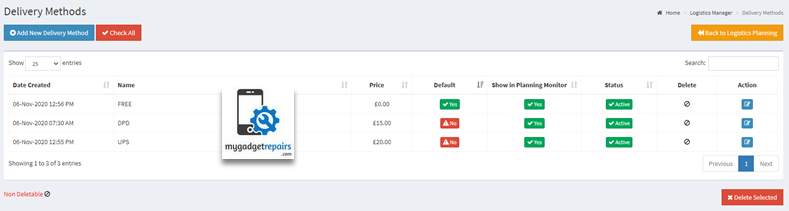
 The following is a very good example of delivery methods which covers different scenarios but please create them according to toy our workflow.
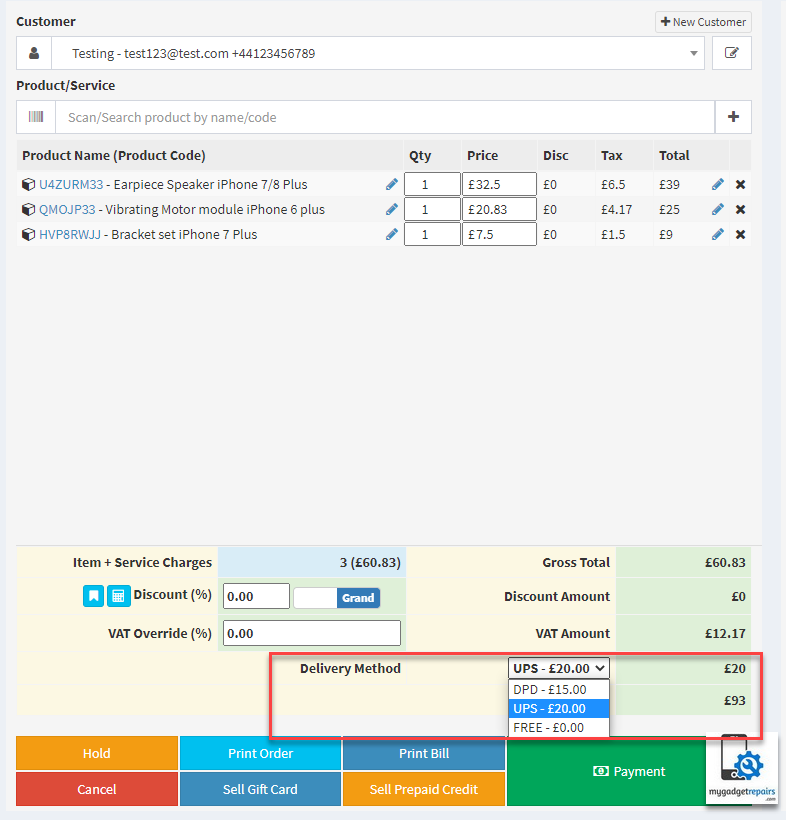
- Once the delivery methods are created all the active ones will be available on the ticket, pos, estimates and recurring invoices interfaces. As soon as the payment is made ticket or pos will be added in the logistics planning screen with “Pending” status so start the logistics flow.
POS Interface:
Ticket Interface:

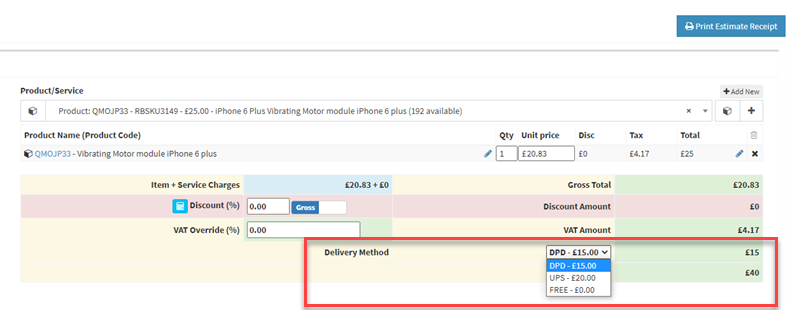
Estimate Interface:
- Ticket invoices and POS sales must be “Fully Paid” or “Partially Paid” otherwise it will not show in the Logistic Planning Screen.
- Logistic Planning screen is where you will see what’s happening with your orders after-sale. As you can see from the screenshot below that the interface is split into 2 sections “Tickets” and “POS“, within each section the orders are grouped by “Delivery Methods” and then “Logistic Status” so you can see where the orders are for each delivery methods.
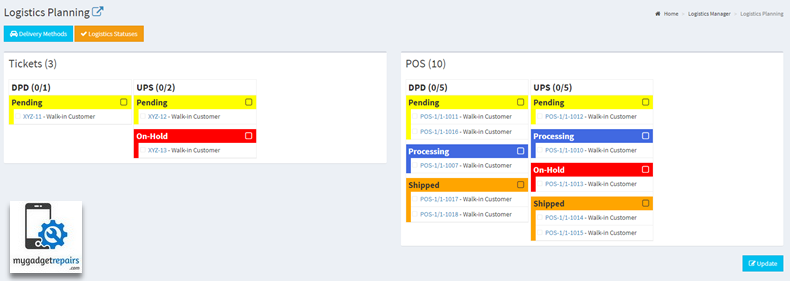
To process, the orders simply click on the orders to select and then click on the “Update” button, from the next screen you can either input the tracking link which will be emailed automatically to the customer or if you’re using one of the followings (“UPS“, “Purolator“, “PackLink) you will see the link to create the shipping labels. The comments section is the same as the ticket, you will add some comments which will be emailed to the customer.
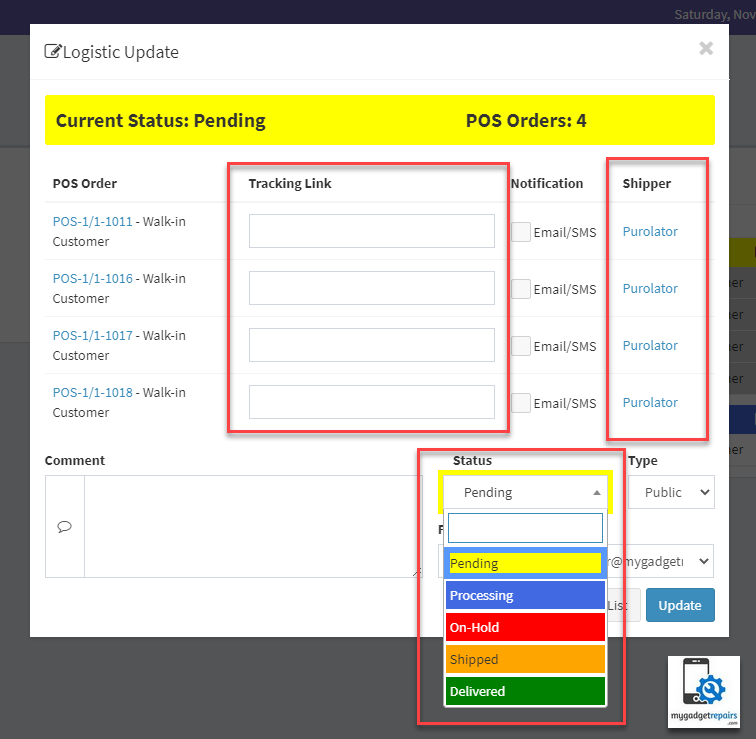
The delivery updates will be handled automatically if you are using the following integrations (“UPS“, “Purolator“, “PackLink) otherwise you will have to manually change the status to shipped.
There is a new notification for logistics “54 – Notify customer when there is a delivery update on Repair Ticket or POS Order” please make the changes accordingly if needed. - As soon as the order is shipped it will come out of the logistics screen however the logistics log will be kept in the “Ticket Timeline View” and “POSTimeline View“. Ticket, POS and Estimate interface has the option to search by any “Delivery Methods” within a given timeframe.

