My Gadget Repairs (MGR) offers seamless integration with your Google Account, allowing users to enhance their workflow by synchronizing calendars, tasks, contacts, and email functionalities. This guide will walk you through the steps to configure the integration effectively.
Prerequisites: Before proceeding with the integration, ensure that you have the following:
- An active Google account
- Access to your MGR account with appropriate permissions to configure integrations
Configuring Integration:
1. Signing in with Google:
- Navigate to the integration page within your MGR account and choose the “Business & Automation” tab.
- Click on the “Sign in with Google” button to authenticate your Google account and follow on-screen instructions.
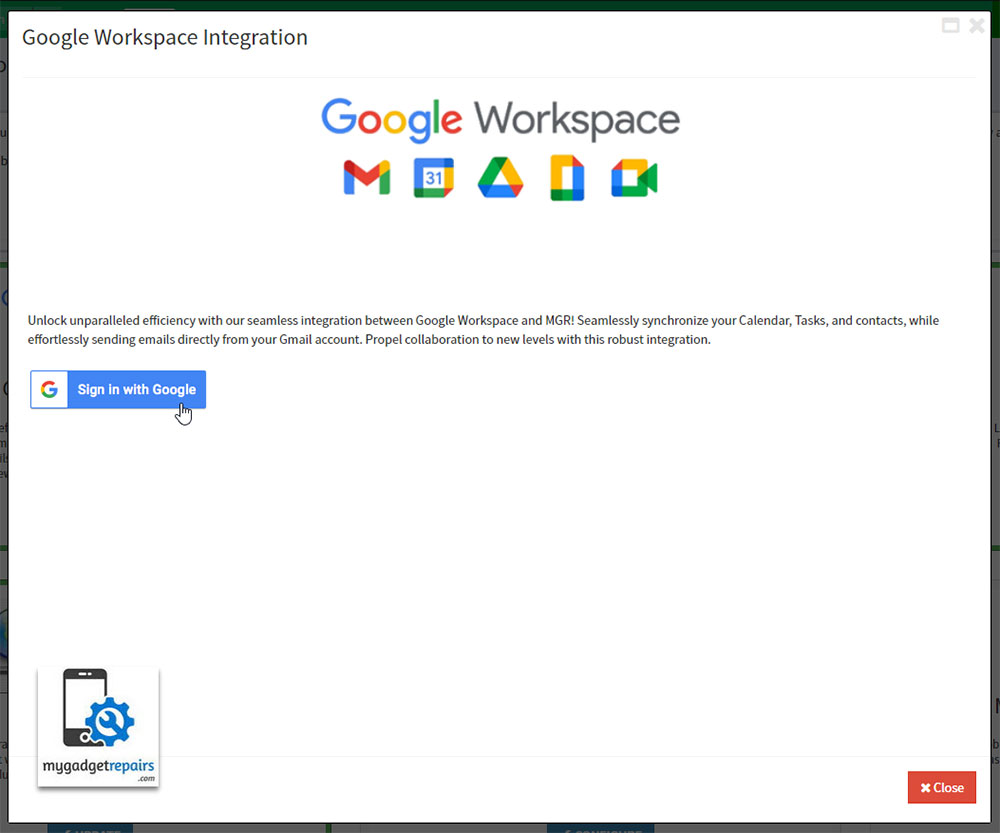
- Follow on-screen instructions by Google.

2. Granting Permissions:
- After signing in with Google, you’ll need to grant permissions for the following features by clicking on the “Consent” button next to each option.
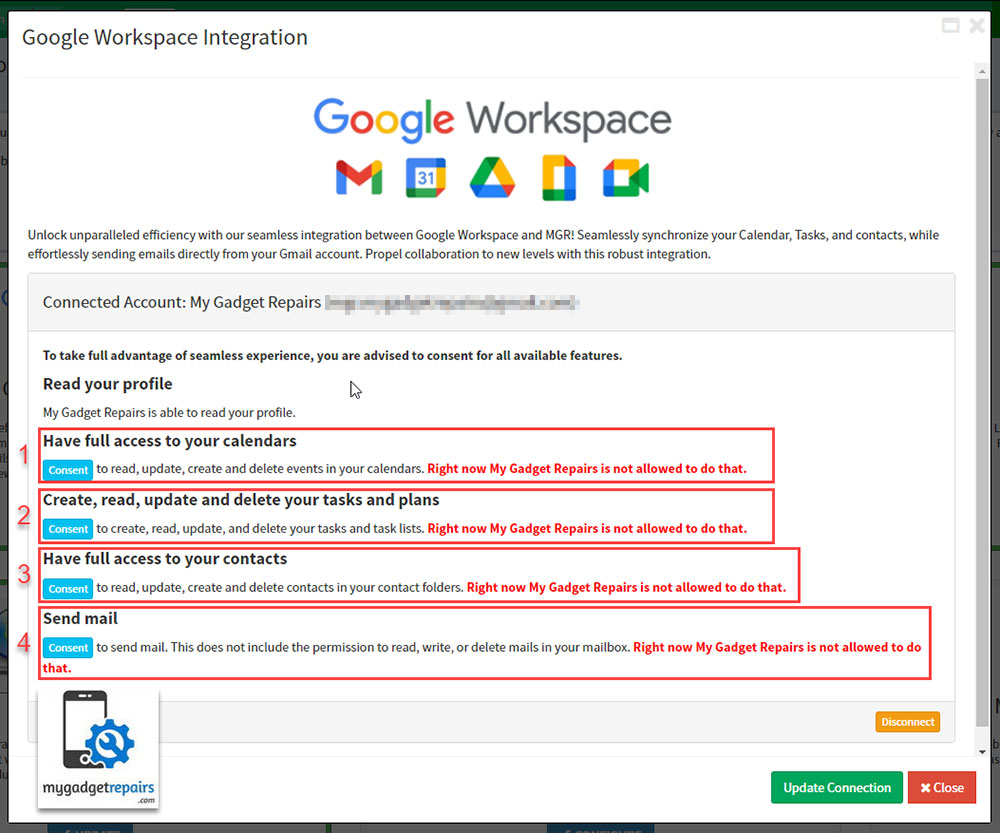
3. Start Syncing with your Google Account.
With each permission given to MGR, respective sections will be enabled for you to start syncing with your Google Account.
Calendar Sync:
- Choose a Calendar: Select the Google Calendar you wish to synchronize with MGR. Ensure that the selected calendar’s time zone aligns with your MGR shop settings.
- Reminder: Select a preset reminder option to be applied to each event created in your Google Calendar.
- Google Meet Conference: Enable this option if you want to create Google Meeting conferences for events in MGR.
Task List:
- Select a List: Choose a task list from your Google Tasks where MGR reminders will be uploaded.

Contacts:
- Select a Group: Choose a contact group from your Google Contacts to synchronize with MGR. Note that changes made in Google Contacts won’t be downloaded to MGR.
Send Email:
- Select a Mail Account: Choose an email address or alias from your Google account to be used as the “from” address for all emails sent from MGR.

Note: Calendar and Tasks are user-based and are connected to individual MGR user accounts. Contacts and Email settings, however, are shop-based and are typically set up by shop admin users.
Configuring Google Workspace (G-Suite) Accounts:
Configuring Google Admin accounts involves managing various aspects of your organization’s Google Workspace (formerly G Suite) services, including user accounts, security settings, app access, and more. Here’s a brief overview of how to set up Google Admin accounts:
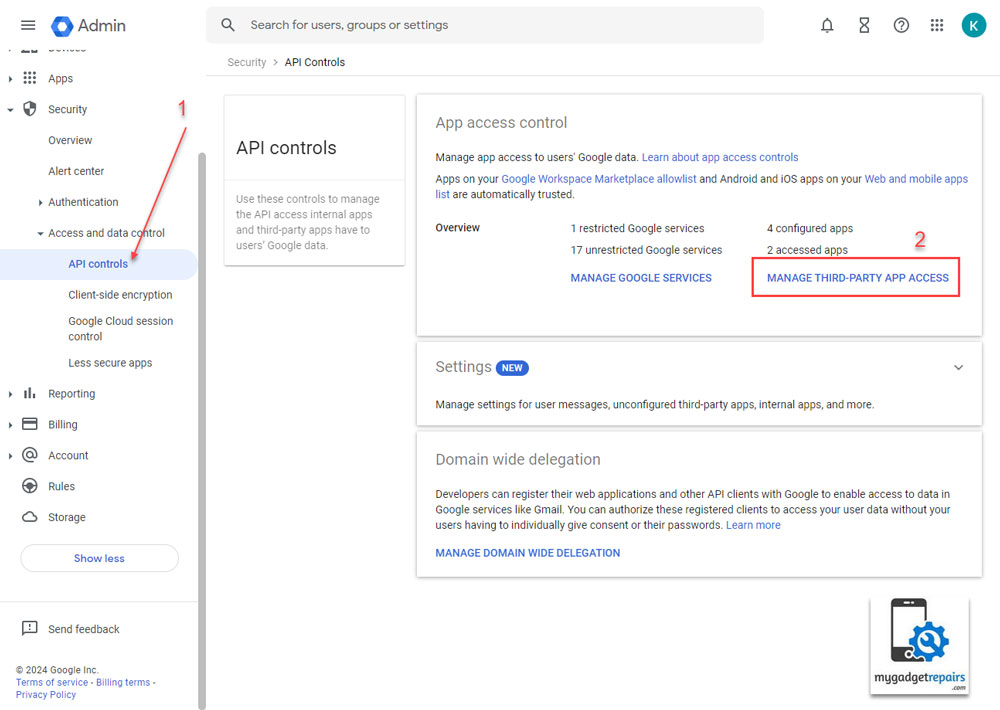
- Sign in to your Google Admin console using your administrator credentials.
- In the left menu, go to Security > Access and data control > API controls.
- In the API controls section on the right side, click Manage Third-Party App Access.
- In the next, screen, click on “Add app” and choose “OAuth App Name or Client ID“
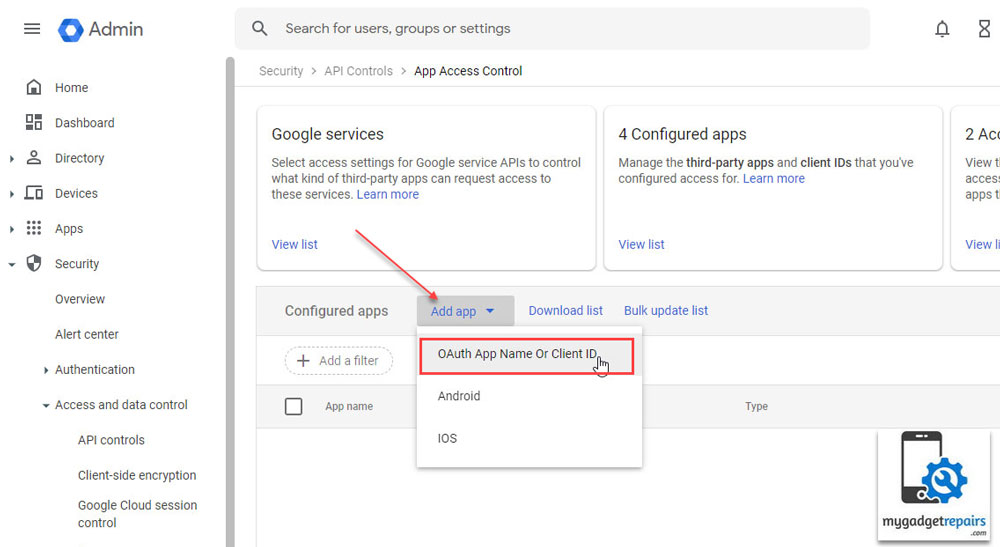
- Configure an OAuth app popup will appear.
- Type “My Gadget Repairs” in the search box and click Search button
- An app “My Gadget Repairs” will appear in the list, click Select button

- In the next screen, you need to select an OAuth Client ID. Make sure you select the one labeled as shown in the screen. It starts with “96184285544-jvnumiqn…….

- Next you need to select the scope. Select yourdomain.com (all users). In your account, “yourdomain.com” will be your own organisation’s domain. Click Continue.

- In the next screen Access to Google Data, Select “Trusted” and click Continue.

- In the next screen, review your selection and click Finish.

- Finally, you should see an entry in your App Access Control page like this.

After following these steps, you can seamlessly integrate your My Gadget Repairs account with your Google Workspace Admin Account.

