Ticket presets are the types of repairs you offer. You can now define attributes of a repair, including the parts you need, paperwork in terms of intake outtake forms, legal documents along with a how-to guide for your technicians, infect “Ticket Presets” are what types of repairs you offer to your customers.
Your staff can create tickets or estimates directly from the “Ticket Presets” and ticket interface or the estimate interface will know what you need in terms of paperwork, products (items) and how many etc.
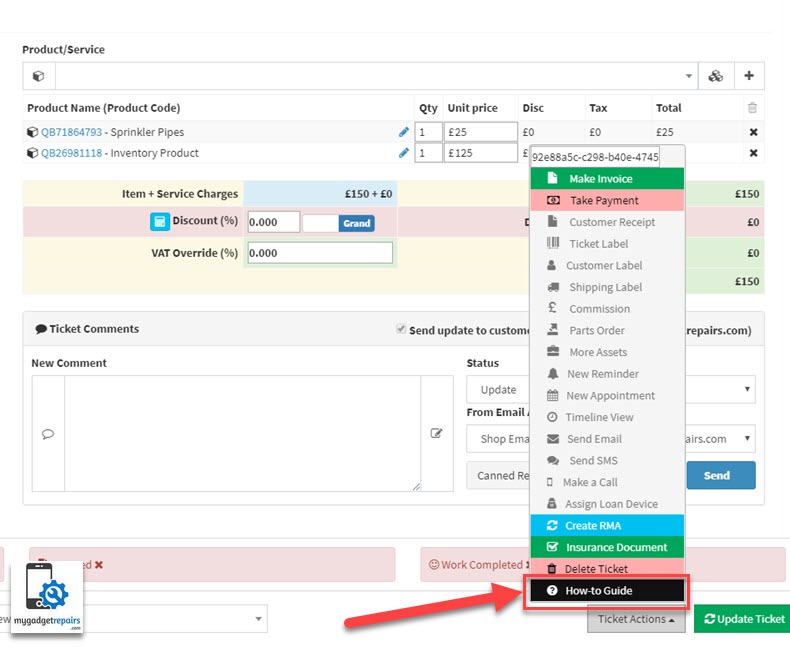
If the repair was created from “Preset” then when your technicians are doing the repair they can click on “How To Guide” for more information.
Let’s start creating “Ticket Presets“.
Please go to the “Ticket Preset Manager“.
On the manager, you can see the list of all the already created presets which are easily searchable. From the action column, you can start creating the ticket or an estimate. You can see the howto guide if you click on the “How-to guide” icon.
To create a new preset please click on the “Add Ticket Preset” button.
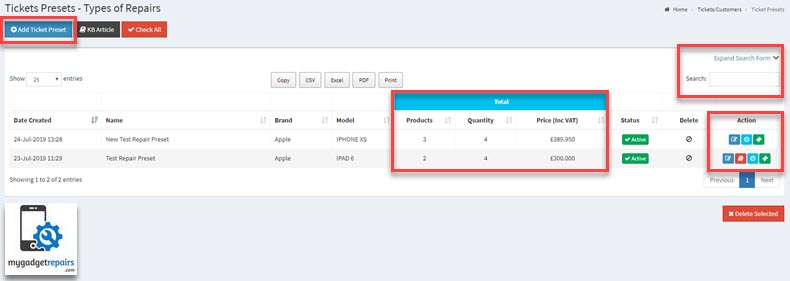
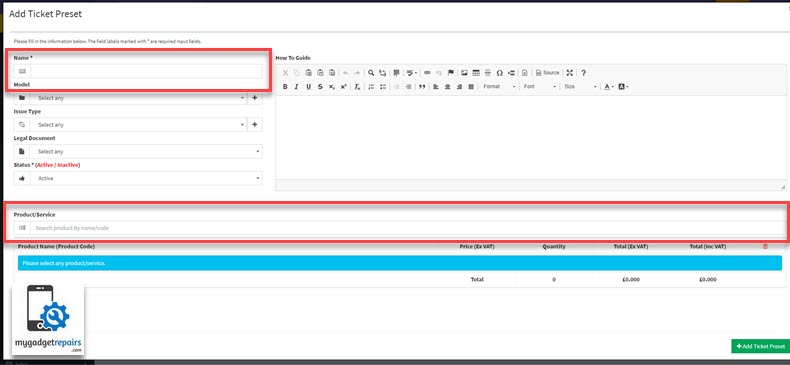
Add the relevant information and don’t forget to add the items you need to fix this type of repair. Once finished just click on the “Add Ticket Preset” button.
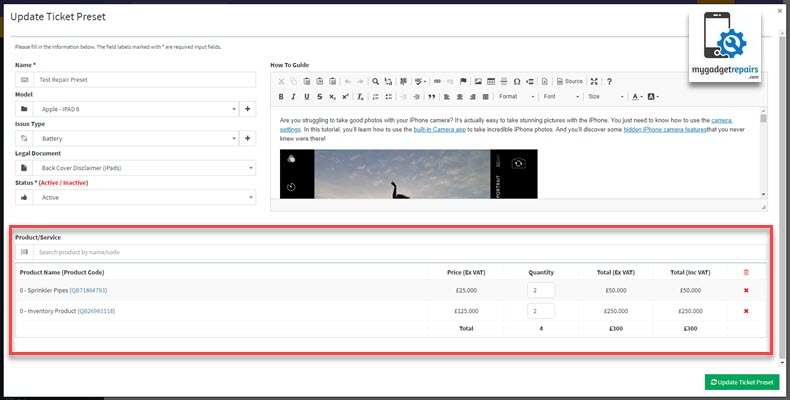
You can modify any existing presets by click on the edit icon.
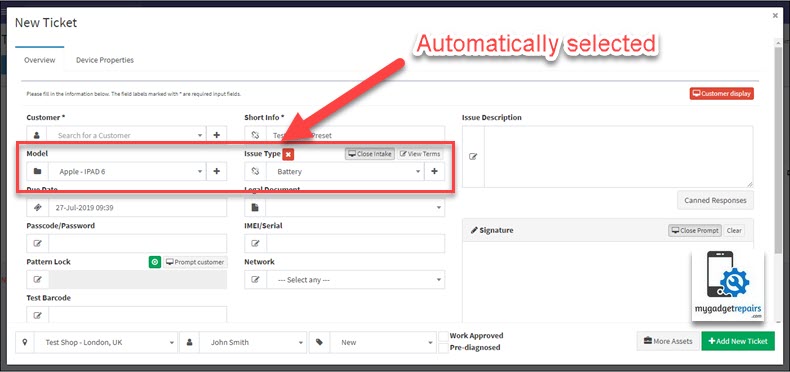
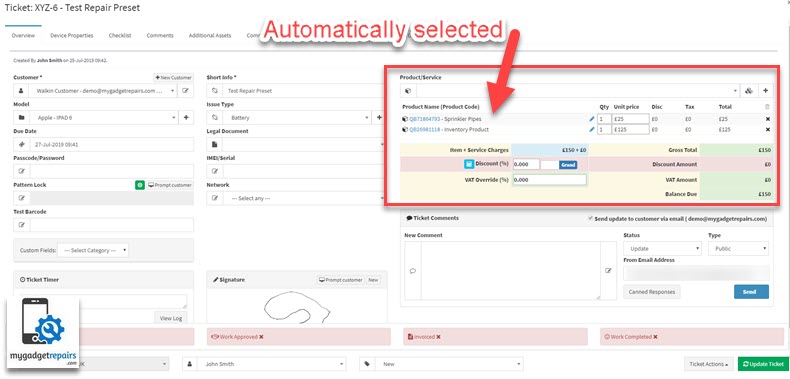
Now let’s create a ticket from the preset interface when I clicked on the create ticket icon on the next screen “Model” and “Issue Type” was already selected as shown in the following screenshot.
Click on “Add New Ticket” please and on the next screen all the items were already added for you as shown in the following screenshot.
When you click on the “Ticket Actions” you will see a new option (If there is a how-to guide) called “How-to Guide“.
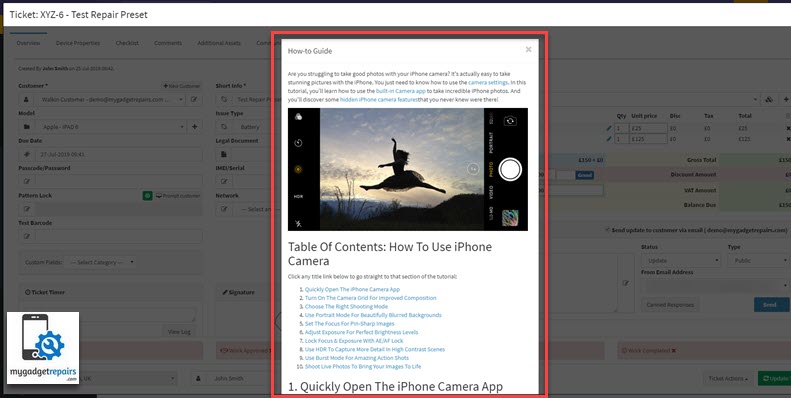
Click on “How-to Guide” will show your staff the process of fixing the relevant repair.
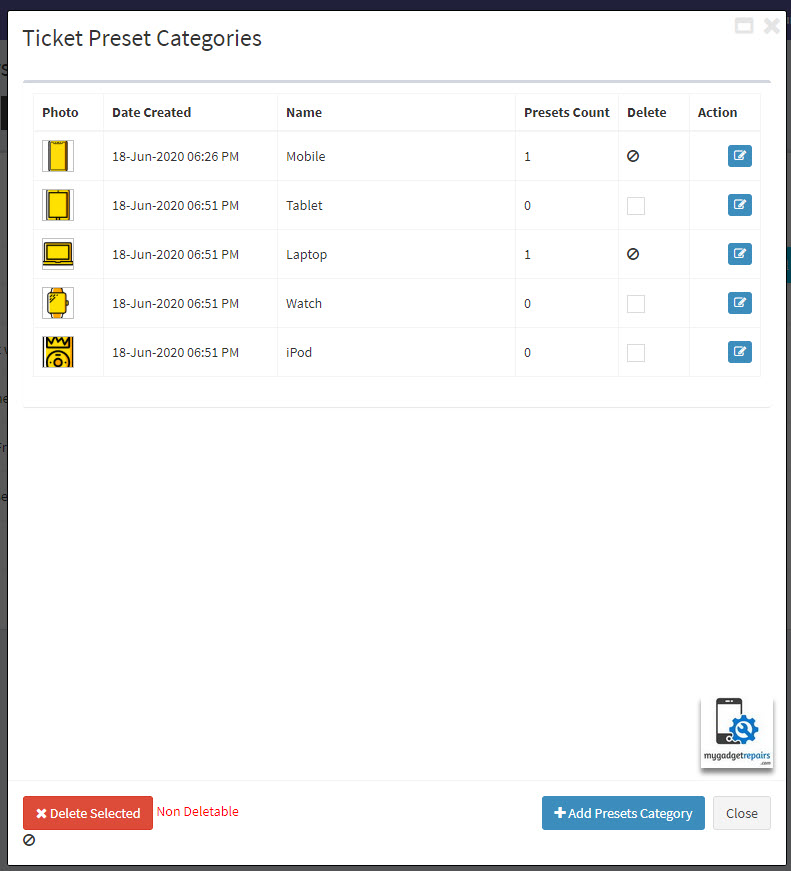
You can also create Preset Categories if needed. By creating preset categories would help the flow. Please click on the “Ticket Preset Categories” button at the top and create the categories you need. The following is the screenshot.
The following is the flow of the “Ticket Preset Wizard“.
There are 6 steps.
- Step 1 – Customer Information
- Step 2 – Choose How to drop it – (Mail-In, Walk-In, On-Site or Pick Up)
- Step 3 – Choose Category
- Step 4 – Choose Brand
- Step 5 – Choose Model
- Step 6 – Choose Issue Type
- Step 7 – Choose Repair Types (Presets)
- Step 8 – Ticket Detail and option to Create Ticket
If you want to integrate presets with your website, please use the Public API as we have added new endpoints for the presets.


