As you’re in the repair industry and we are aware that warranty claims are inevitable. Faulty parts, incomplete repair or other issues may force an angry customer to bang at your doors. At this time of panic, the last thing you want to do is verifying if the warranty is still applicable!
Followings are the process of creating warranties.
- Create a Warranty
- Attach warranty to a product.
Let’s start by creating a warranty. Please go to the “Warranty Manager“.
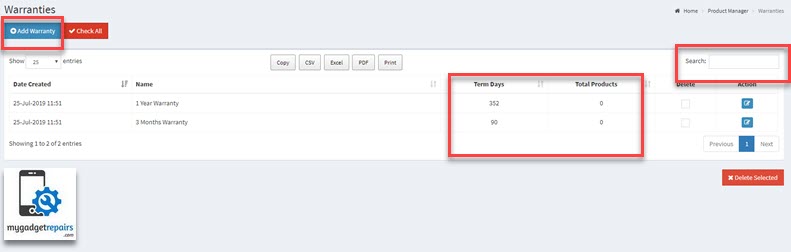
On the manager, you can see the list of all the already created warranties which are easily searchable.
To create a new bundle please click on the “Add Warranty” button.
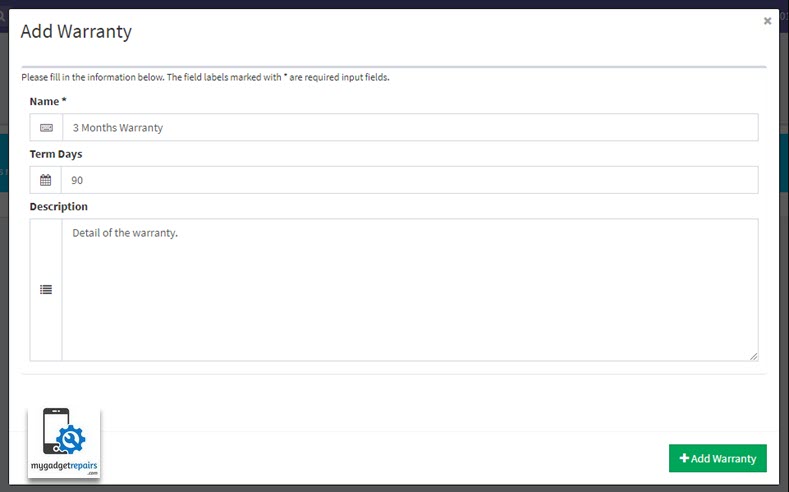
Add the relevant information and don’t forget to add the term days. Once finished just click on the “Add Warranty” button.
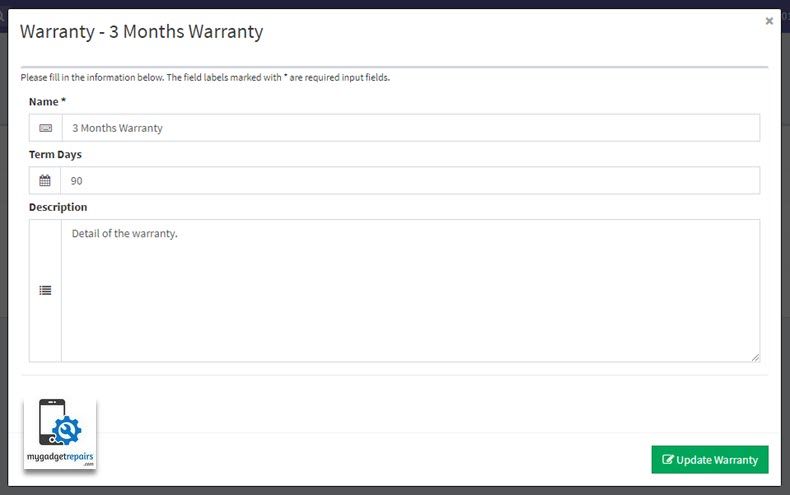
You can modify any existing presets by click on the edit icon.
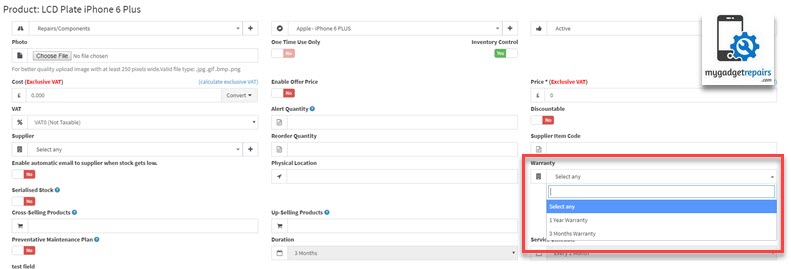
Once the desired warranties are created now its time to associate then with the actual products or services.
Let’s modify the product you want to select the correct warranty applicable to this product.
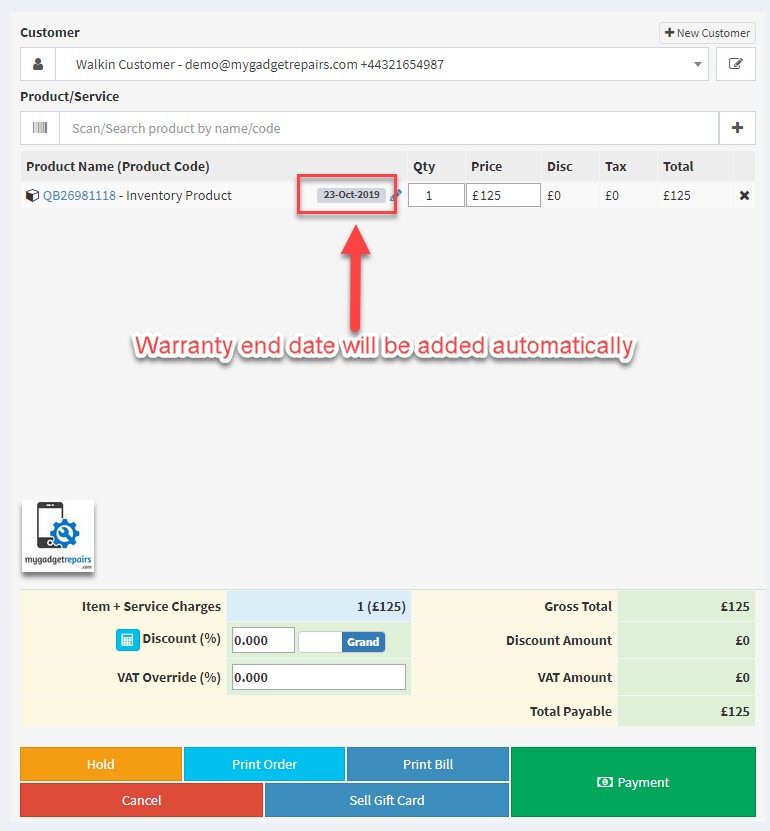
Click on “Update Product” button and close the window. Lets now go to the POS and sell this item. As soon as you scan the bar code the system will create the warranty based on the product configuration. See the following screenshot.
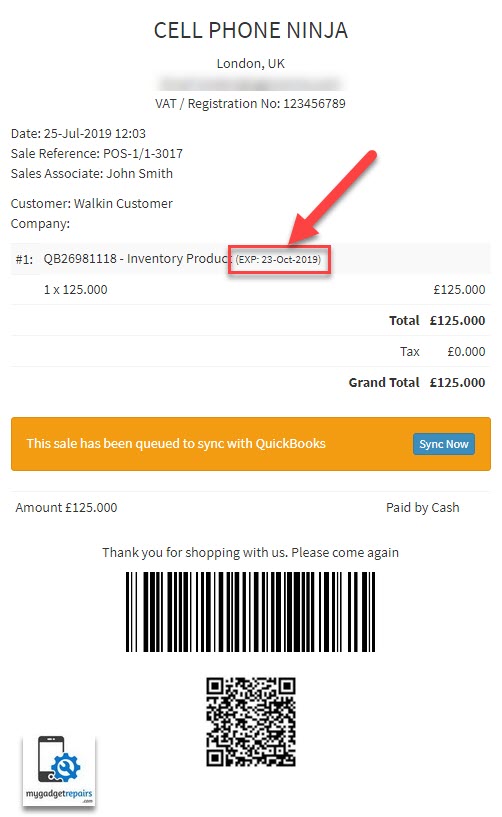
Also, customer receipt will have the same information.
Same principle applies when you add the product via the ticket interface,

