Our buy-back module offers a comprehensive solution for purchasing and managing buy-backs. A simple process allows you to use an existing customer or create a new one, with a selection of ID mandatory before a transaction can be generated. You also have access to the “Market Prices” database so your staff can be more accurate when giving prices to the customer.
Benefits of Customer Purchases Module
Some of the benefits of the “Customer Purchases” Module are listed below:
- Ability to buy pre-owned or refurbished items and then re-sell them.
- Offer “Buy Back” on each item line.
- Ability to add as many trade-in items in a single purchase
- Ability to pay them cash or give them “Customer Credit” so they can use that money towards another sale.
- Seller ID is required along with other information including verification document upload.
- Everything is logged against the customer.
- Print thermal receipts to keep a record of Trade-In Purchases.
- Use the Current Market Price module to determine the accurate price.
- Customer Token facility, it really helps when a customer has left their items in store for you to give a price and you are busy, you can give them a token with a receipt to confirm what they have left in the store.
- View your purchases via Trade-In Report.
- Convert Trade-In items to a product instantly.
Let’s dive into the Customer Purchase Module.
- Please make sure that “Customer Credit” is enabled in the shop settings. Please go to “Shop Settings” > “Customer Tab” > “Loyalty Rewards/Customer Credit“.

- Please go to “Tickets/Customers” > “Customer Purchases“.
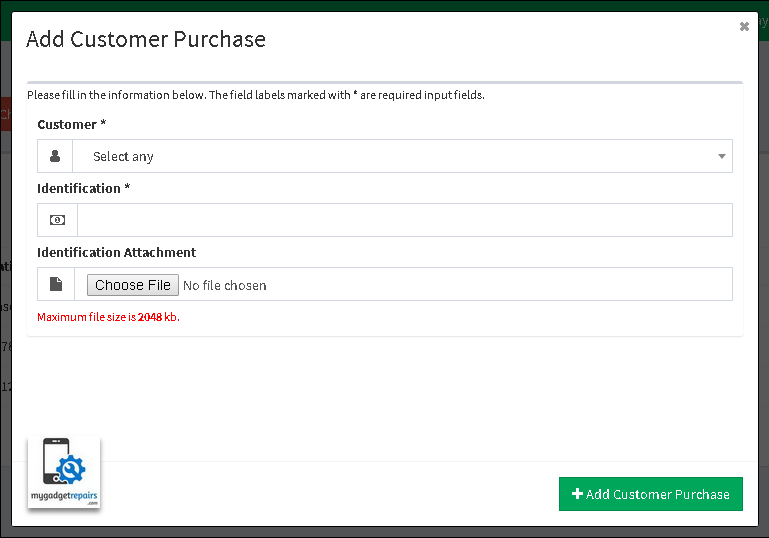
- Click on the “Add Customer Purchase“. Fill in the required information and then click on “Add Customer Purchase” button.
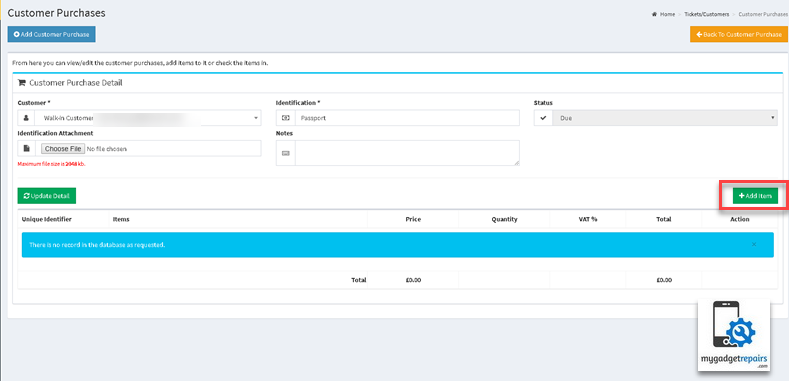
- On the next screen please click on the “Add Item” button.
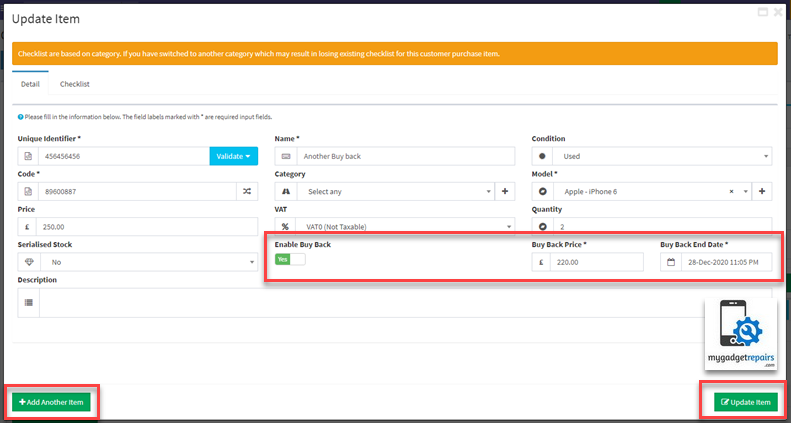
- Fill in the information, if you want to get the “Current Market Price“, click on the “Product Market Price“. Also, if you’re offering “Buy Back” then please enable that and enter the “Buy Back End Date” and “Buy Back Price“.
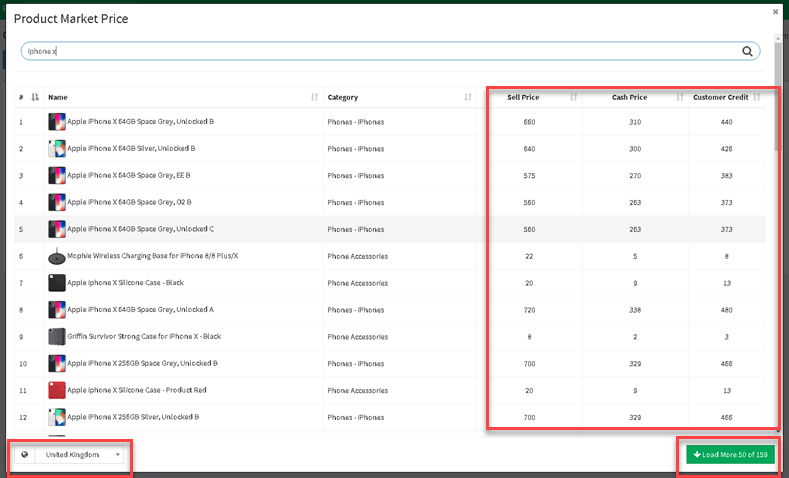
- Please type the product name, in the following example I need to find out the current market price of “iPhone X 64 GB Unlocked Grade B“.
The system has given me 3 types of prices next to each item.
Sell Price: The system is telling you that you should not sell it for less than that price.
Cash Price: Price to offer customer – Buy Price
Customer Credit Price: If the customer wants to use the money towards another sale in this case you generally offer more money than the cash price.
So if I want to buy an “Apple iPhone X 64 GB Space Grey, Unlocked B” the system is telling me that I should not pay more than £310 cash price, £440 as credit and I should not sell it for less than £660. So I will make a profit of either £350 or £220. Please remember that prices are real-time and they change by the minute.
- Please click on the copy icon which will update the “Name” and “Price“, please fill in the rest of the detail and click on the “Add Item” button. Repeat the same process to add more items. Once finished click on the “Make payment” button, if a signature is required then click on the signature button which will display a signature prompt on the customer screen.
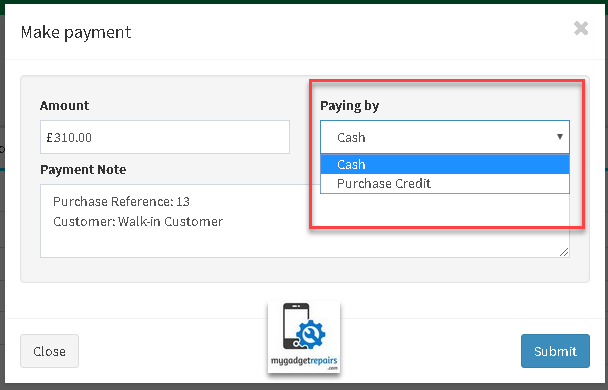
- On “Make Payment” you decide how you are paying the customer, cash is the default value, if you have “Loyalty Rewards Program / Customer Credit” enabled then you can pay them by “Customer Credit”
For accounting purposes, please select the correct customer purchase expense category in the shop settings under the customer tab first. Click here to go to settings. Otherwise, the “Make Payment” button will not show.
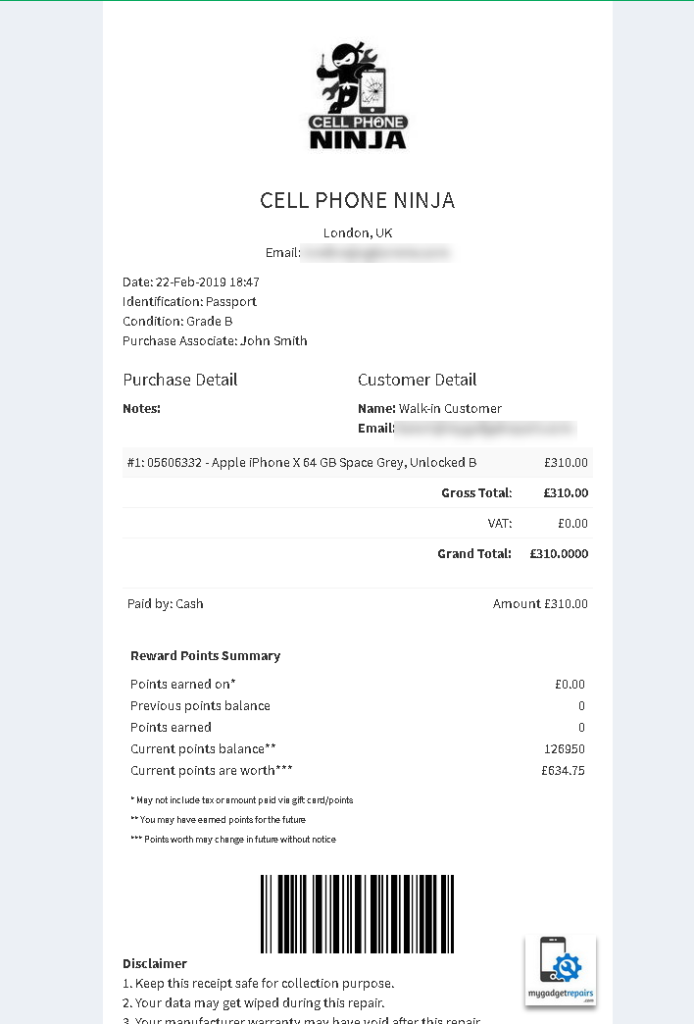
- Once paid you can then create a “Customer Receipt” and there will be an option to add individual items to the inventory. There is a new template in the “Template Editor” for customer purchase receipts.
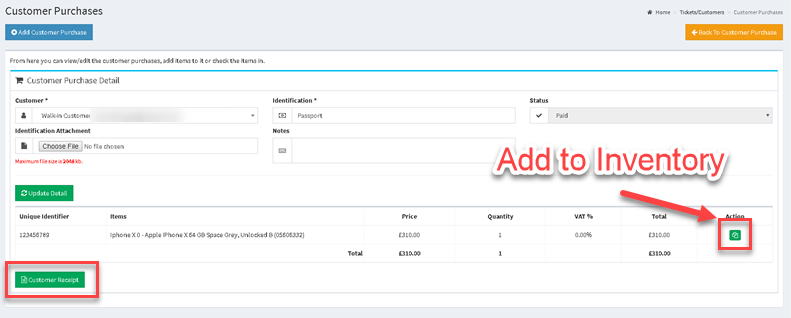
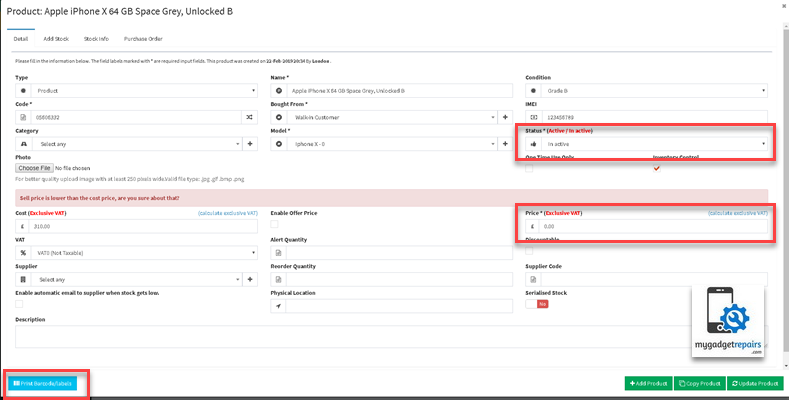
- The “Add to Inventory” button will add the item to the inventory however status will be inactive, you will have to make it active and set the “Selling Price” accordingly. Print the barcode labels from the same page. Now your item is ready to put on the shelve to sell.
- If you want to pay customers via “Customer Credit” then the amount will be added to their “Virtual Wallet” which can be used to towards another sale.

“Refurb” process on “Customer Purchase”
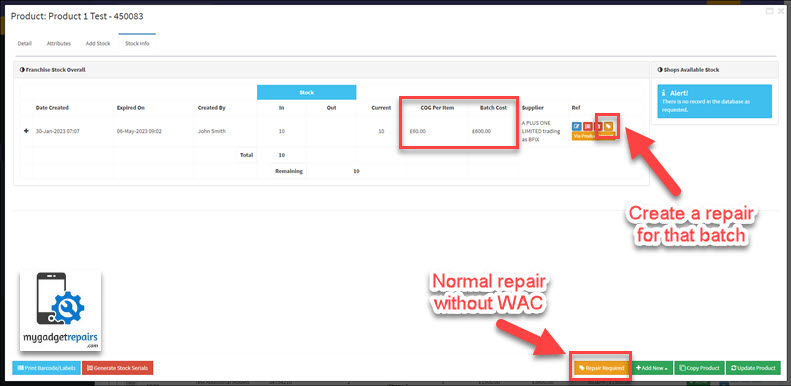
Some of your “Customer Purchases” may need some work on them, you can start the “Refurb” process from the product screen. If you want the system to re-calculate the “COST OF GOODS” after the repair then the product must have the “Weight Averaged Stock” enabled. Once the “Weight Averaged Stock” is enabled you will see the “Create Ticket” next to each batch you added this way once the ticket is “Resolved/Picked up” the system will use the cost and update the stock batch along with the product’s “Cost Price” accordingly.
If the product doesn’t have “Weight Averaged Stock” enabled you can still create the tickets so you know how many repairs have been done however the automation of updating the “Weight Averaged Stock” will not happen but you still have the option to update the product “Cost” manually.
Show “Customer Purchase/Refurbs” in the “Ticket Activity Boxes”
You can also show the “Customer Purchase” related “Refurbs” in the “Ticket Activity Boxes” however you will need to create a saved search for it.
- Please head to the “Dashboard” and click on the “Tickets in the Pipeline” from the activity boxes.
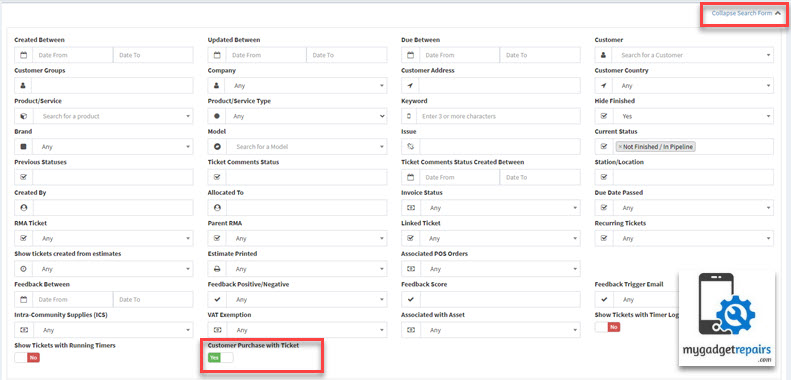
- You will be taken to the ticket manager, please expand “Search Form” and set “Customer Purchase with Ticket” to “Yes“.
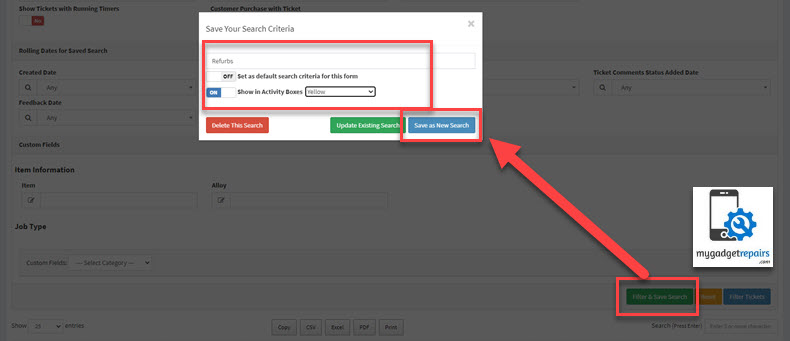
- Then click on the “Filter and Save Seach” button that will open a new popup, please enter the name as “Refurbs” or anything you want, set “Show in Activity Boxes” to yes and then click on “Save as New Search“.
- Once saved it will be shown in the “Ticket Activity Boxes“.


