The stock count is the physical verification of the quantities and condition of items held in an inventory or warehouse. The stock count may be performed as an intensive annual end-of-year procedure or may be done continuously by means of a cycle count. An annual end of year stock count is typically done for use in a company’s financial statements. Once the count has been completed, you can add an adjustment to update your current stock.
Please follow the following steps to undertake a stock count
- Go to the stock count.
- Click on “Count Stock” button.
- A new window will open, please enter a reference number, from type select either “Full” or a “Partial” stock take. “Full” stocktake will be the whole of the inventory and on “Partial” stocktake will be based on a particular brand or a specific category.
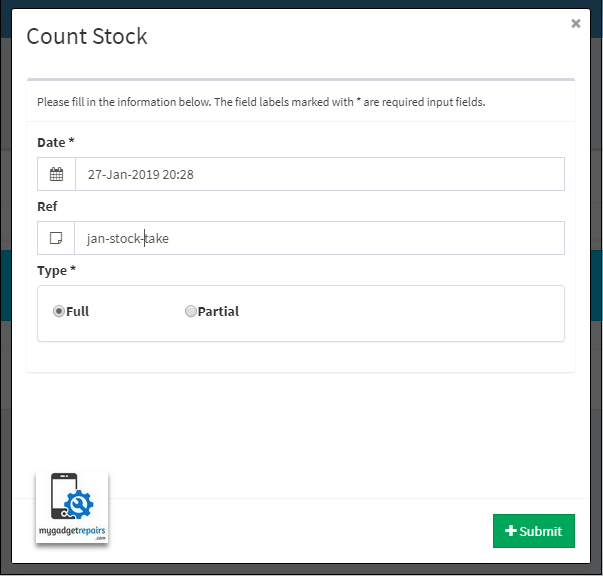
- Click on “Submit”
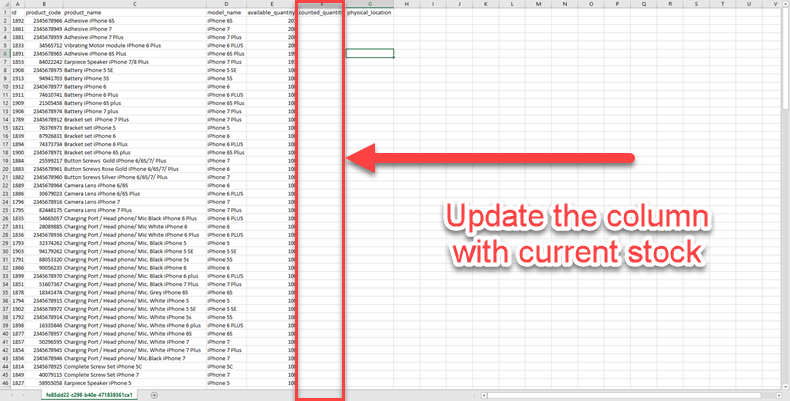
- The system will generate an XLS file, please download the XLS file.

- It will look like the following image. Now populate the column F (counted_quantity) according to your current stock.
- Once you have finished counting your stock please save the XLS file. Now go back to the stock count page and click on the “Process” button as shown in the following image.
There are also 2 additional columns in the stock count generated file.
Missing: The same ability “Missing” has been added to the stock count process as well. Please set the column called “Missing” to 1 when all the serialised stock is “Missing” for this product. If the product is serialised and there is something in the “Available Quantity” and the “Counted Quantity” is 0 then the system will set all the available serials as “Missing” on the next step.
Serialised: This is to indicate if the product is serialised or not, please note that these products will be ignored during the stock count process unless you use the above “Missing” flag.
- Please click the browse button on the next page and select the XLS file to finalise the stocktake.
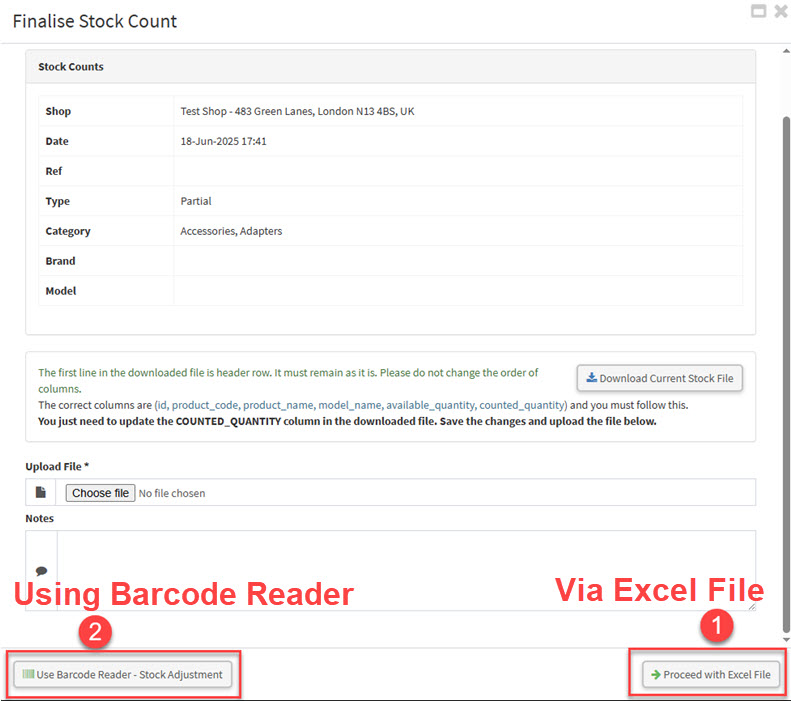
- You now have two options to proceed:
- Using Excel File: Select this option if you prefer to continue managing the data via the Excel file. This method allows for bulk updates, easy edits, and is especially useful if you have multiple entries to review or adjust. Carry on from point 10.
- Using Barcode Reader: Choose this option if you wish to complete the final step using a barcode scanner. This is ideal for quick, hands-on processing, especially in environments like repair shops, warehouses, or retail counters where speed and accuracy are key. Jump to point 12.
- The next screen will show you all the data as shown in the following picture, along with the differences in the stock values. Click on “Add stock Adjustment” to proceed.
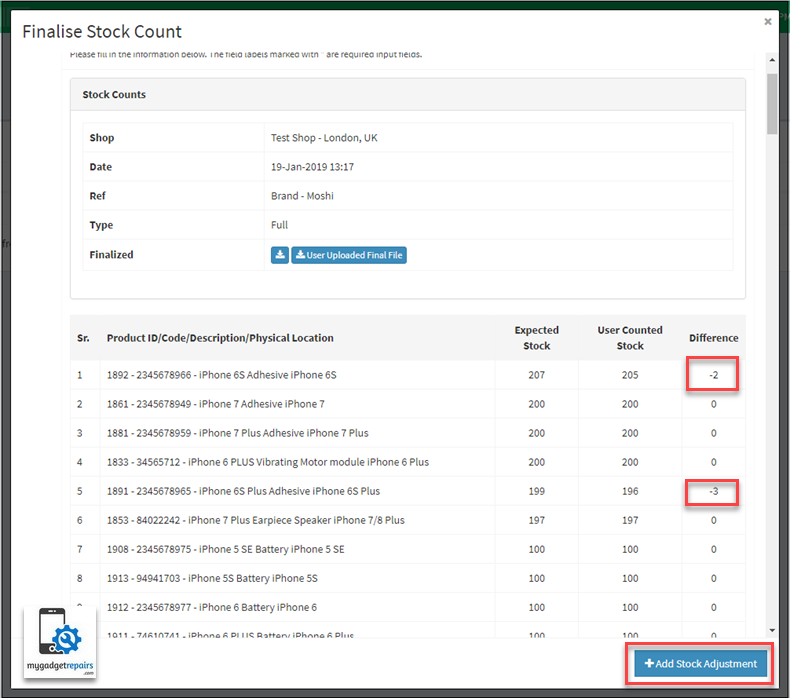
- The next screen will only give you the stock items where the difference is. Please add the date-time, reference or attachment if needed. Click on “Add Stock Adjustment” again to finish the process.

- This section is for option 2. Selecting this option will redirect you to the Add Stock Adjustment page, where products will be automatically populated as you scan them using your barcode reader. This method significantly speeds up the stock adjustment process by reducing manual entry and ensuring greater accuracy. It’s ideal for high-volume updates or when working in a warehouse or stockroom environment. This interface has the following features that make the stock count easier.
- Zero Stock Items Highlighted in Red
- Any products with a counted stock of zero but an available stock greater than zero will now be highlighted in red. This allows you to immediately identify potentially missing items, helping you resolve discrepancies before finalising the count.
- Auto-Save Session – Never Lose Progress Again
- Your stock count session is automatically saved in real-time.
- Whether your browser crashes, your device restarts, or your internet connection drops, you can pick up exactly where you left off, without losing any of your progress. This is especially critical during full stocktakes that can take hours to complete.
- Serialised Icon Now Visible for Serialised Products
- There will be a visual serialised icon next to products that are tracked by serial numbers on the Stock Adjustment page. This makes it quicker and easier to identify serialised items at a glance, especially when managing long product lists.
- This improves stock visibility and helps prevent errors when adjusting inventory for products that require serial number tracking.
- Product Highlight on Scan
- When you scan a product barcode or serial number, the system will automatically locate and scroll to that specific product on the page. The row will be highlighted with a blue background for 3 seconds, allowing you to easily spot the item in a long list.
- This visual cue helps you quickly verify:
- How many times has the item already been counted?
- Whether it needs to be recounted or adjusted.
- Whether it needs to be recounted or adjusted.
- Use Cases:
- Rechecking a Product: If you’re unsure whether an item has already been scanned, simply scan it again. The page will jump to it and show its current count.
- Overriding Counted Figures: If you’ve found an error in the physical count, scan the product to instantly locate it and override the figure with the correct count.
- Verifying High-Volume Stock: In large inventories where similar items are listed together, this feature ensures you’re updating the correct entry without having to manually scroll or search.
- Spotting Anomalies: If the system has already recorded an unusually high or low count, scanning the item will take you straight to it so you can investigate and take action immediately.
- Pending Stock Count Dropdown
- When navigating to the “Add Stock Adjustment” page, the system will now automatically detect if there are any pending stock counts that have been initiated but not yet completed. A new dropdown labelled “Pending Stock Count” will be displayed at the top of the page, allowing you to quickly view and select from all active counts that are in progress.
- By selecting a pending stock count from the list, you can seamlessly resume the adjustment process exactly where you left off, without the need to start over or duplicate effort. This enhancement ensures greater accuracy, improves efficiency in stock management workflows, and helps maintain data integrity during inventory reconciliation.
- Reset Pending Stock Count
- The “Reset Pending” option is located next to the “Pending Stock Count” drop-down. This feature allows you to restart the entire stock count process for a pending stock adjustment from the beginning.
- Important Notice:
- Using the Reset Pending option will permanently delete all previously recorded stock count figures associated with the current adjustment. This means any progress made will be erased, and the stock adjustment will return to its initial state, as if no items had been counted.
- This action is irreversible and cannot be undone, so please proceed with caution. Only use this option if you’re certain that the current count data is inaccurate, incomplete, or needs to be restarted entirely.
- This feature is ideal for situations where:
- The initial count was started in error.
- Significant discrepancies were identified.
- A new team is taking over the counting process and wants to start clean.
- Delete Pending Stock Count
- There is another option called “Delete Pending”, located next to the “Pending Stock Count” dropdown. This feature allows you to permanently delete any stock count entries currently marked as pending.
- Please note that this action will completely and irreversibly remove all associated stock data related to the selected adjustment. Once deleted, these records cannot be recovered under any circumstances.
- Use this option with caution, and ensure that the pending stock count is no longer required before proceeding. If in doubt, consider reviewing or exporting the data before deletion.
- You can always start the count again from the Stock Count Manager should you need to reinitiate the process at a later time.
- Zero Stock Items Highlighted in Red
- With this intuitive interface, simply scan the product’s barcode or serial number, and the system will instantly update the count for you, eliminating manual entry, reducing errors, and speeding up your inventory process.
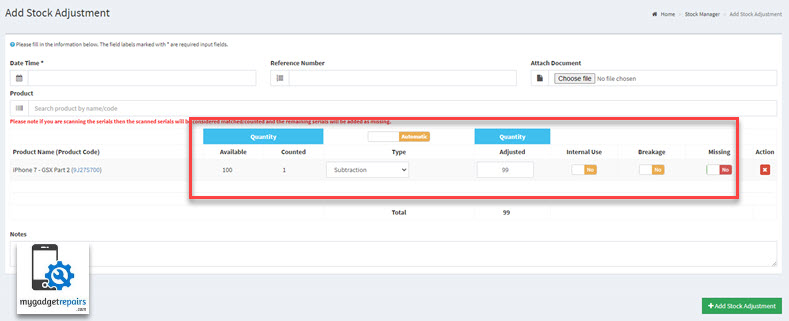
Please note that you can also create a Stock Adjustment directly as well without creating the stock count. This will allow you to log the internal use, breakage as well as any other issues with your stock.
Internal Use: Internal use is when you use the stock for an internal repair and don’t want to create a ticket for it but stock needs to be decreased accordingly.
Breakage: Breakage is when you have given the parts to your repairer and he/she accidentally damaged it during the repair. You can also log the “Breakage” via the ticket interface as well.
Missing: Missing is when you have lost the given serials and it will be added as missing which will reduce the stock accordingly.
When there is an “Internal Use” or “Breakage” the system will flag the scanned items as not available and it will be the same case when the items are serialised. Those ones will not available on the ticket or pos interface, The stock serial page will show you a flag next to those ones as “Internal Use” or “Breakage” so you know what happened with them.
Simply scan the bar code and select “Internal Use” or “Breakage” as shown in the following screenshot.
There might be a case when during the repair your technician found out that the part is “Defective“, in such a case you will NOT be using the stock adjustment because this “Defective” part has to be returned back to the supplier for a replacement so your technicians will be using the ticket interface to log the “Defective” part that way the system will add the part in the “RMA – Defective Parts and when you create the PO it will be available there with all the other ones.
Please make sure that you have enabled “Allow Adding Defective/Breakage?” in the shop settings > tickets first. The following is the screenshot to record “Breakage” or/and “Defective” from the ticket interface. Please click on the icon shown in the following screenshot.

Once clicked it will show the following popup where you can add the values of the “Breakage” and “Defectives“, once entered click on “Update” button.
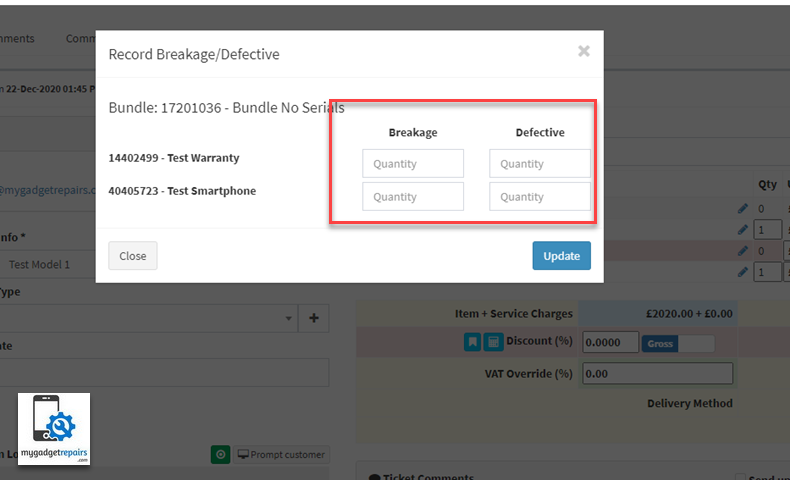
Please note that in the case of a serialise stock you must record a “Breakage” or “Defectives” first and then scan the replacement serial. This is ONLY if you’re using doing it from the ticket interface.

