Experience seamless integration with your Microsoft Office 365 Account through My Gadget Repairs (MGR). Elevate your workflow by effortlessly synchronizing calendars, tasks, contacts, and email functions. This guide is designed to assist you in configuring the integration with precision and efficiency.
Prerequisites: Before proceeding with the integration, ensure that you have the following:
- An active Microsoft Account
- Access to your MGR account with appropriate permissions to configure integrations
Configuring Integration:
1. Signing in with Microsoft Account:
- Navigate to the integration page within your MGR account and choose the “Business & Automation” tab.
- Look for the integration card labeled “Office 365” and click on the “Configure” button
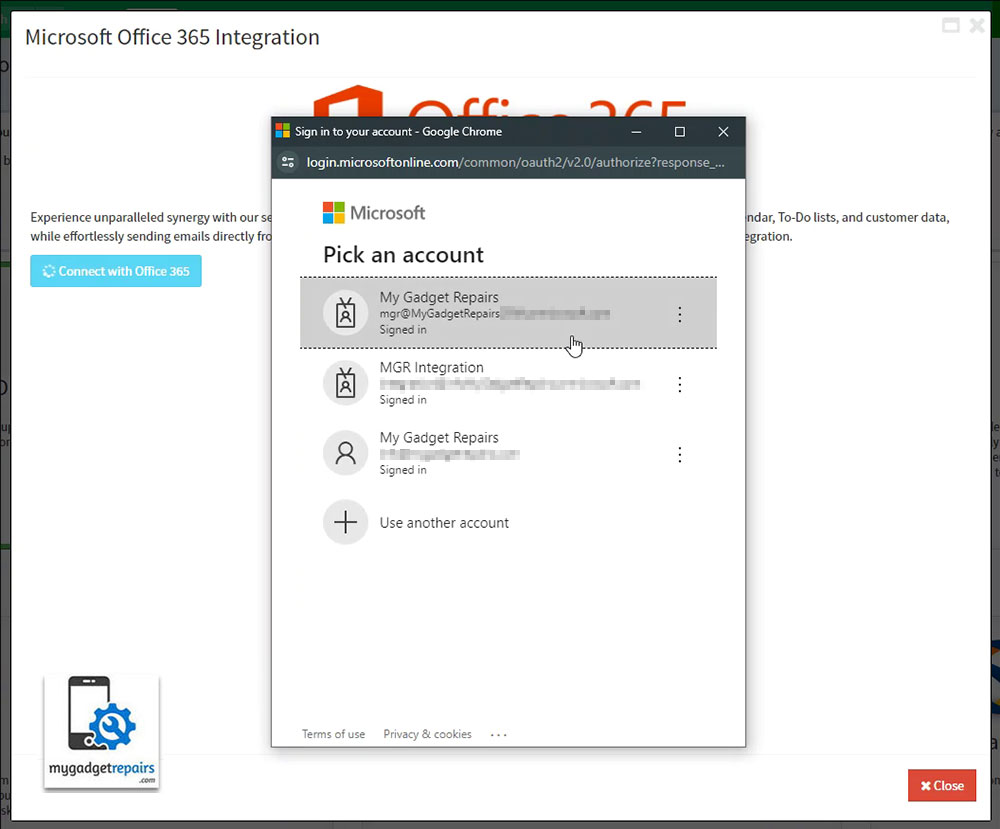
- Click on the “Connect with Office 365” button to authenticate your Microsoft account and follow on-screen instructions.

- Follow on-screen instructions on sign-in screen.
2. Granting Permissions:
- After signing in with your Microsoft account, you’ll need to grant permissions for the following features by clicking on the “Consent” button next to each option.

3. Start Syncing with your Microsoft Account.
With each permission given to MGR, respective sections will be enabled for you to start syncing with your Microsoft Account.
Calendar Sync:
- Choose a Calendar: Select the Outlook Calendar you wish to synchronize with MGR. Ensure that the selected calendar’s time zone aligns with your MGR shop settings.
- Reminder: Select a preset reminder option to be applied to each event created in your Outlook Calendar.
- Meeting with Teams: Enable this option if you want to create online meeting with Microsoft Teams for newly created events in MGR.
Task List:
- Select a List: Choose a task list from your Microsoft To-do Tasks where MGR reminders will be uploaded.

Contacts:
- Select a Group: Choose a contact folder from your Outlook Contacts/People to synchronize with MGR. Note that changes made in Outlook Contacts won’t be downloaded to MGR.
Send Email:
- Select a Mail Account: Choose an email address from your Microsoft account to be used as the “from” address for all emails sent from MGR.
Save to Sent Items: If set to YES, every email sent will be stored in your mailbox’s saved items folder.
Note: Calendar and Tasks are user-based and are connected to individual MGR user accounts. Contacts and Email settings, however, are shop-based and are typically set up by shop admin users.
Configuring Microsoft 365 Accounts:
MGR allows you to connect any Microsoft 365 account and enable the “Send email as yourself” option. This uses your authenticated Microsoft account to send notification emails directly from your mailbox via Microsoft Graph API, ensuring a personalised and secure communication experience.
In some cases, you may prefer not to send emails directly from your personal or primary account—for example, to use a generic sender address such as notifications@yourcompany.com, or to maintain privacy. In such scenarios, MGR supports configurations where you authenticate with one Microsoft 365 account but send emails from another user account within the same tenant.
To enable this, the authenticated account must have “Send As” or “Send on Behalf” permissions for the desired sender account. Alternatively, your organisation can grant application-level permissions to MGR, allowing it to send emails on behalf of any user within the tenant (with administrator consent).
Please consult your Microsoft 365 administrator to configure the appropriate permissions for this setup.
Log onto your 365 Tenant as your Global Administrator (for example GlobalAdmin@XZYCompany.onmicrosoft.com) and assign “Send As” and “Read and Manage (Full Access) – If needed” to this Global Administrator for the mailbox you are going to use to send email as (as per below).

Proceed with setting up the MGR 365 Integration using the Global Admin Account as the account to connect the MGR Integration with and then select the mailbox/user you chose above as the mailbox to use for email (ie. Reception@XYZCompany.com).

